(Page créée avec « {{Tuto Details |Main_Picture=Pose_du_moteur_AVIDSEN_800px-Pose_du_moteur_et_de_sa_cr_maill_re_IMG_9467.JPG |Description=Dans cette notice, vous allez apprendre à mettre e... ») |
|||
| Ligne 10 : | Ligne 10 : | ||
{{Introduction}} | {{Introduction}} | ||
{{Materials}} | {{Materials}} | ||
| + | {{Separator}} | ||
| + | {{EPI}} | ||
{{Separator}} | {{Separator}} | ||
{{Tuto Step | {{Tuto Step | ||
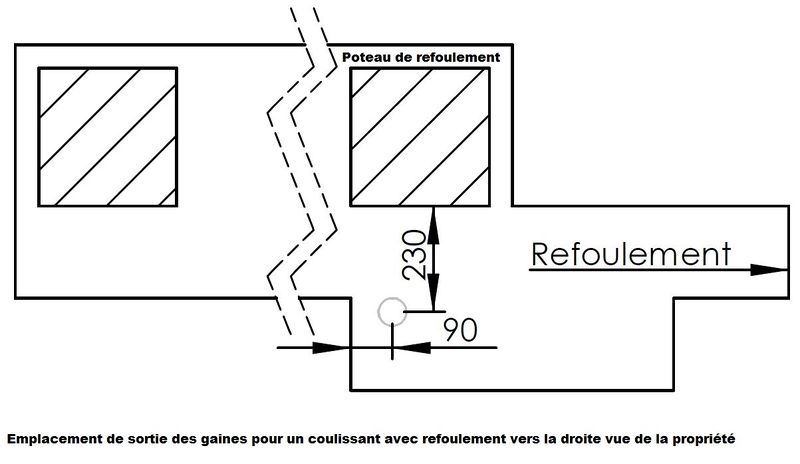
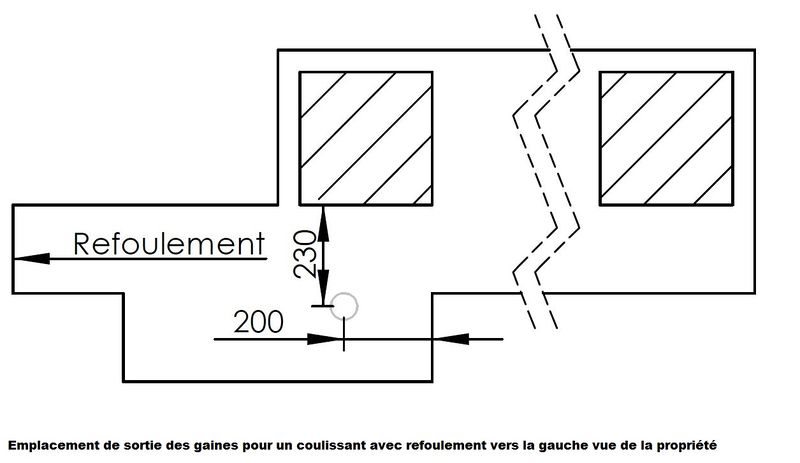
| + | |Step_Title=Plan de passage des câbles | ||
| + | |Step_Content=* Avant la pose de votre produit, passez des gaines suivant le plan. | ||
| + | * Vous trouverez un plan pour un refoulement côté droit et un plan pour un refoulement côté gauche | ||
|Step_Picture_00=Pose_du_moteur_AVIDSEN_800px-Pose_du_moteur_et_de_sa_cr_maill_re_C_blage_droite.jpg | |Step_Picture_00=Pose_du_moteur_AVIDSEN_800px-Pose_du_moteur_et_de_sa_cr_maill_re_C_blage_droite.jpg | ||
|Step_Picture_01=Pose_du_moteur_AVIDSEN_800px-Pose_du_moteur_et_de_sa_cr_maill_re_C_blage_gauche.jpg | |Step_Picture_01=Pose_du_moteur_AVIDSEN_800px-Pose_du_moteur_et_de_sa_cr_maill_re_C_blage_gauche.jpg | ||
}} | }} | ||
{{Tuto Step | {{Tuto Step | ||
| + | |Step_Title=Emplacement de la sortie des gaines | ||
| + | |Step_Content=Fiez vous aux plans joints (un plan refoulement droit vue intérieur et un plan refoulement gauche vue intérieur) pour faire sortir vos gaines et vos câbles. | ||
|Step_Picture_00=Pose_du_moteur_AVIDSEN_800px-Pose_du_moteur_et_de_sa_cr_maill_re_Emplacement_moteur3.JPG | |Step_Picture_00=Pose_du_moteur_AVIDSEN_800px-Pose_du_moteur_et_de_sa_cr_maill_re_Emplacement_moteur3.JPG | ||
|Step_Picture_01=Pose_du_moteur_AVIDSEN_800px-Pose_du_moteur_et_de_sa_cr_maill_re_Sortie_de_c_ble_D.JPG | |Step_Picture_01=Pose_du_moteur_AVIDSEN_800px-Pose_du_moteur_et_de_sa_cr_maill_re_Sortie_de_c_ble_D.JPG | ||
| Ligne 21 : | Ligne 28 : | ||
}} | }} | ||
{{Tuto Step | {{Tuto Step | ||
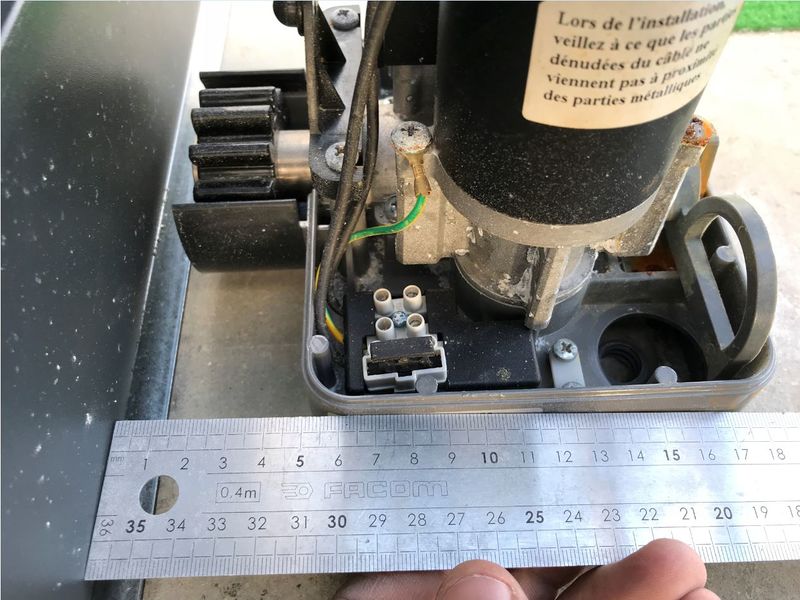
| + | |Step_Title=Marquage de l'emplacement du moteur | ||
| + | |Step_Content=* Positionnez le moteur, il doit se situer environ à 50mm de la traverse basse du coulissant. | ||
| + | * Tracer ensuite l'emplacement des trous de fixations | ||
|Step_Picture_00=Pose_du_moteur_AVIDSEN_800px-Pose_du_moteur_et_de_sa_cr_maill_re_Position_du_moteur2.JPG | |Step_Picture_00=Pose_du_moteur_AVIDSEN_800px-Pose_du_moteur_et_de_sa_cr_maill_re_Position_du_moteur2.JPG | ||
|Step_Picture_01=Pose_du_moteur_AVIDSEN_800px-Pose_du_moteur_et_de_sa_cr_maill_re_IMG_9461.JPG | |Step_Picture_01=Pose_du_moteur_AVIDSEN_800px-Pose_du_moteur_et_de_sa_cr_maill_re_IMG_9461.JPG | ||
}} | }} | ||
{{Tuto Step | {{Tuto Step | ||
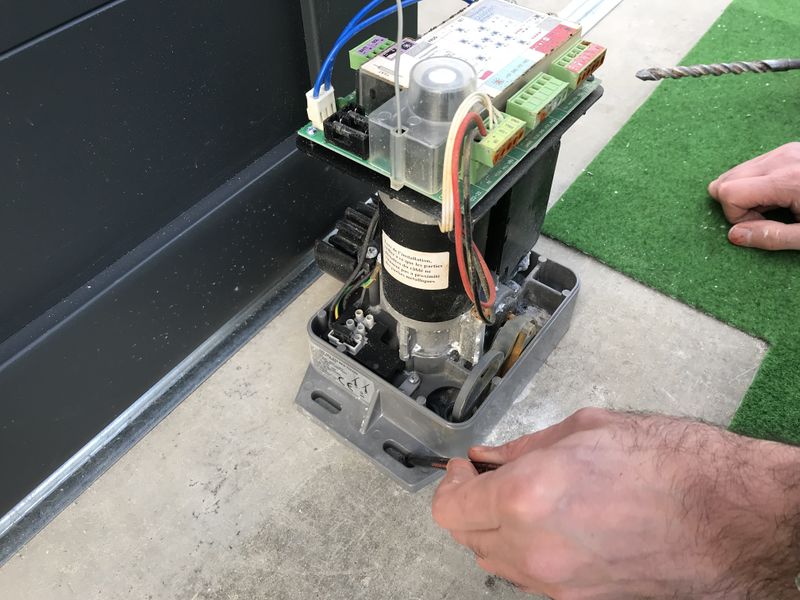
| + | |Step_Title=Fixation du moteur | ||
| + | |Step_Content={{Info|Sur le moteur AVIDSEN, les fixations du moteur au sol ne sont pas fournies.}} | ||
| + | |||
| + | * Percez aux emplacements tracés | ||
| + | * Sceller de la tige filetée de Ø8mm. Elle doit dépasser de 40mm minimum du sol. | ||
| + | * Poser ensuite le moteur sur 4 écrous + rondelles, faites les réglages de niveau nécessaires. | ||
| + | * Une fois les réglages effectués, assurez le serrage du moteur avec 4 écrous + rondelles | ||
| + | * Le moteur doit se situer entre 15 et 20mm du sol | ||
|Step_Picture_00=Pose_du_moteur_AVIDSEN_800px-Pose_du_moteur_et_de_sa_cr_maill_re_IMG_9466.JPG | |Step_Picture_00=Pose_du_moteur_AVIDSEN_800px-Pose_du_moteur_et_de_sa_cr_maill_re_IMG_9466.JPG | ||
}} | }} | ||
Version du 17 avril 2019 à 09:22
Dans cette notice, vous allez apprendre à mettre en place le moteur AVIDSEN fourni dans votre pack motorisé.
Difficulté
Moyen
Durée
30 minute(s)
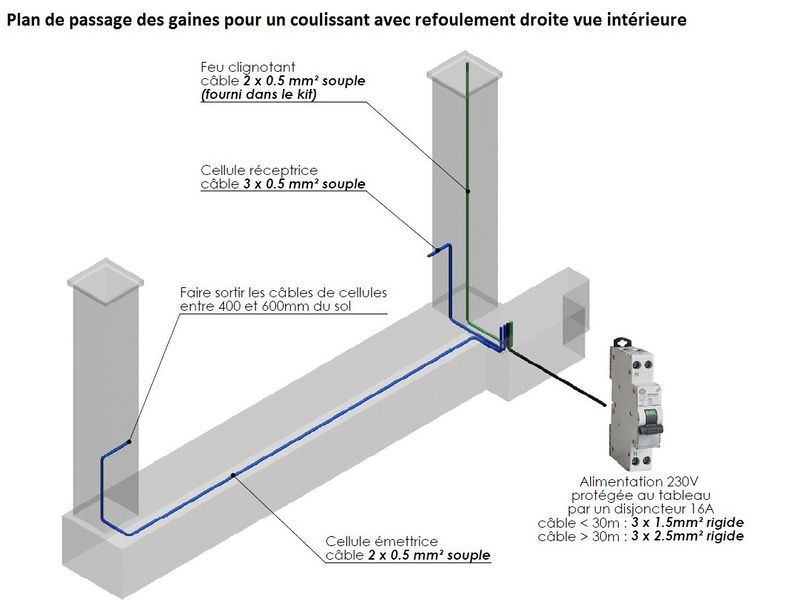
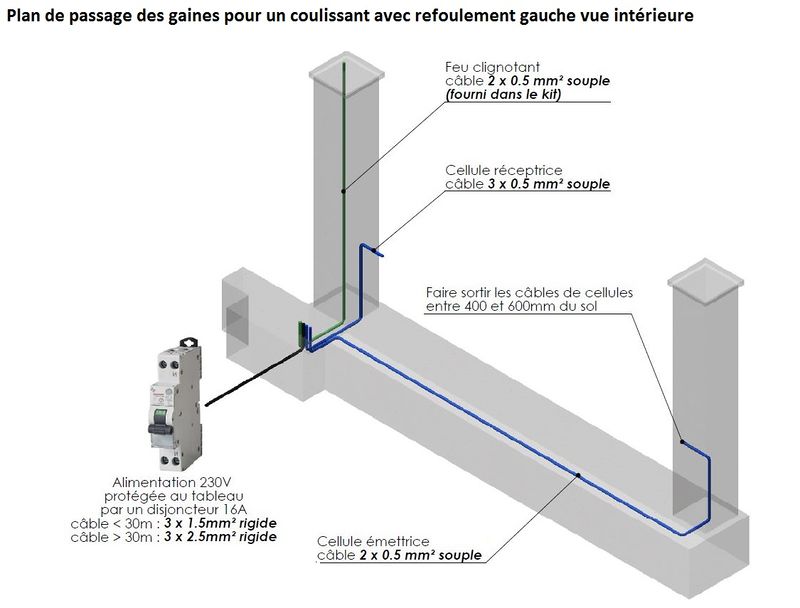
Étape 1 - Plan de passage des câbles
- Avant la pose de votre produit, passez des gaines suivant le plan.
- Vous trouverez un plan pour un refoulement côté droit et un plan pour un refoulement côté gauche
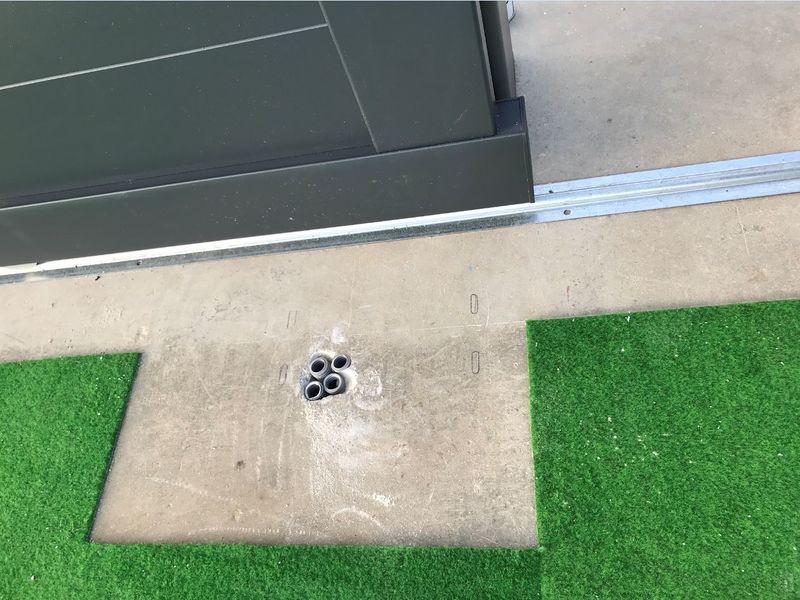
Étape 2 - Emplacement de la sortie des gaines
Fiez vous aux plans joints (un plan refoulement droit vue intérieur et un plan refoulement gauche vue intérieur) pour faire sortir vos gaines et vos câbles.
Étape 3 - Marquage de l'emplacement du moteur
- Positionnez le moteur, il doit se situer environ à 50mm de la traverse basse du coulissant.
- Tracer ensuite l'emplacement des trous de fixations
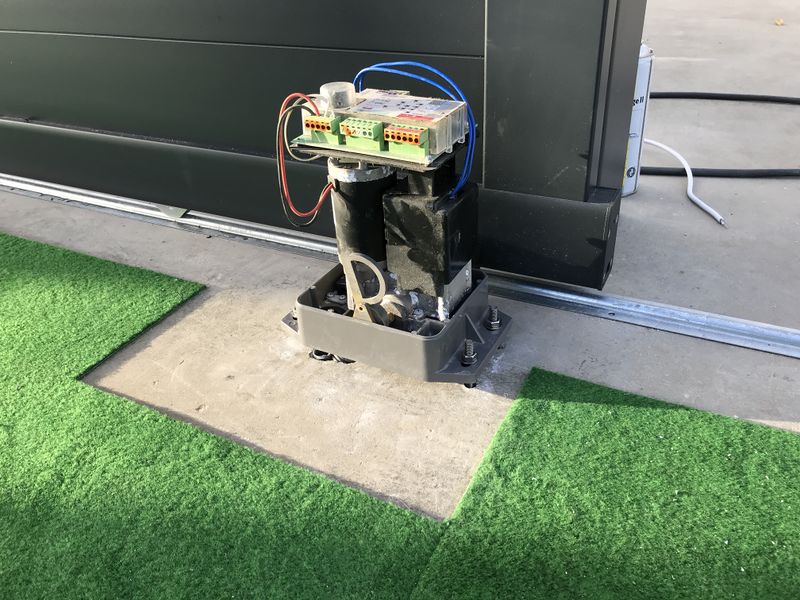
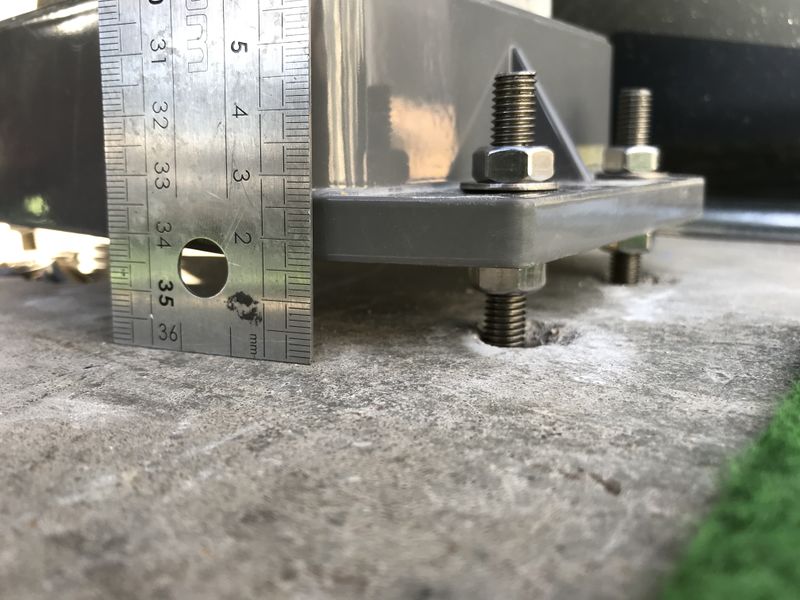
Étape 4 - Fixation du moteur
- Percez aux emplacements tracés
- Sceller de la tige filetée de Ø8mm. Elle doit dépasser de 40mm minimum du sol.
- Poser ensuite le moteur sur 4 écrous + rondelles, faites les réglages de niveau nécessaires.
- Une fois les réglages effectués, assurez le serrage du moteur avec 4 écrous + rondelles
- Le moteur doit se situer entre 15 et 20mm du sol
Draft
